‘Windows Home Server’ Build & Setup
I recently setup a new Windows Home Server and this post covers why I chose this operating system and how I setup my server.
Requirements
My requirement was for an extendable ‘always on’ network attached file storage solution that would allow me to access my files from any machine in the house (and ideally remotely via the Internet when required) whilst providing some fault tolerance data protection. Having all my data in one place makes it easier to manage (less duplication of files across machines) and easier to back-up. This centralisation of data however means being more susceptible to hardware failure (e.g. hard disk failure) and so a solution with either a RAID configuration or something similar was required which ruled out most budget NAS Storage devices. After investigating the options I decided to build a Windows Home Server (WHS). This meets all the requirements above and also adds other neat features such as the extensible Add-In model (a huge bonus for a .Net developer like me).
Buy vs Build
Having decided on Windows Home Server as the solution the next step was to decide whether to buy or build. There are several very smart WHS devices available from manufacturers like HP and Acer. Whilst these are the easy option they are not the cheapest or the easiest to extend. Also the availability of these devices varies depending on your geographical location. Based on these factors I decided to build.
Build Option
The fact that WHS has such modest hardware requirements means that building a server is a very economical option. As my server will be ‘always on’ I put power efficiency as a key requirement in my build. To this end I considered the Intel Atom processor found in most ‘NetBooks’. These consume little power and pack enough punch to run WHS comfortably. The Atom CPU comes pre-attached to an Intel motherboard (you can’t buy them separately yet) for under £50. However as I wanted the storage in my server to be extendable and grow over the next few years I needed the space for at least 4 hard drives but the majority of Intel Atom boards only come with 2 SATA ports. Some boards do exist with four SATA ports but they are hard to source. Another possible Atom drawback is that it may be difficult to source Windows 2003 drivers (required for WHS) for ‘NetBook’ targeted Atom motherboards.
Buy Option
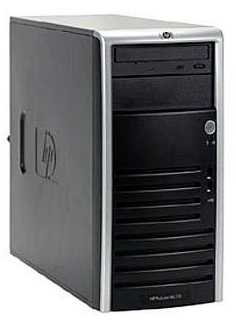
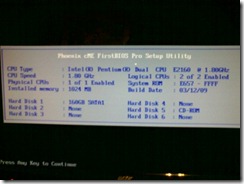
Eventually after some investigations I had a list of parts to build into my shiny new server, but also a few reservations. Firstly would all these components play nicely together and would the build be solid enough to meet my ‘always on’ requirement. After discussions with a colleague he suggested I look for pre-built end of line servers, which is what I did. I quickly found the HP Proliant Ml110 G5 going for £170, bargain. With 1GB RAM, Dual Core Pentium 1.8Ghz CPU, on-board video, Gigabit NIC (Network Interface Card), 160GB HDD, DVD ROM and a multitude of SATA ports it was ideal.
Sure it lacked the power saving benefits of an Atom processor based server but it’s solid Enterprise level build quality more than makes up for it. As the server is designed to run Windows 2003 drivers would also not be a problem.
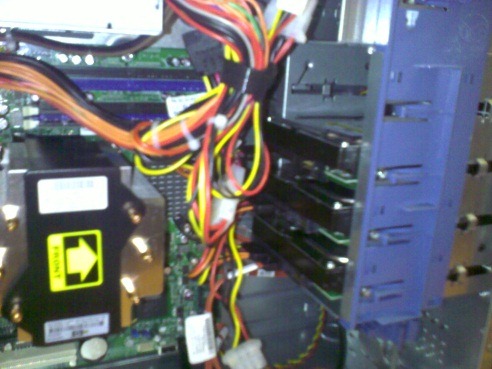
For storage I purchased two Western Digital Caviar Green 750GB SATA drives to sit alongside the HP’s 160GB disk. By buying two I can make full use of WHS’s data duplication features to protect my data. Whilst the ‘Green’ branded disks are not as fast as traditional drives they are packed with energy saving features which I value in an ‘always on’ server.
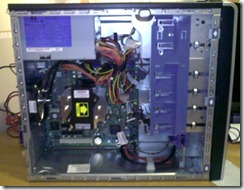
Hardware
After much deliberation on whether to use the faster 160GB drive or the larger 750GB drive for the system drive I decided to install a 750GB drive as the system drive, mainly to ensure maximum extendibility. Whichever I installed as the system drive I would be stuck with (without reinstalling the Operating System) and I didn’t want to be limited to the smaller 160GB drive. To make installation of the OS easier I only connected up the first hard drive, and then connected the other two later once the OS was up and running.
Software Installation
Once the hardware was sorted I put in the WHS DVD and followed the instructions. The installation went quicker than expected, surprisingly not spending long on performing the ‘Microsoft Updates’. Once installed I logged on to find that WHS didn’t have the right NIC (Network Interface Card) drivers and therefore the NIC hadn’t been installed. This of course explains why I didn’t have to wait for the install to download the updates as it couldn’t get on the web to find them. I installed the NIC drivers from the HP CD and rebooted to find that I could now access the internet via Internet Explorer but neither ‘Windows Update’ nor ‘Product Activation’ would connect. After further investigation (and much head scratching) I found this error in the Windows Event Log:
Type: Error. Source: W32Time.
Description: Time Provider NtpClient: An error occurred during DNS lookup of the manually configured peer ‘time.windows.com,0x1’. NtpClient will try the DNS lookup again in 15 minutes. The error was: A socket operation was attempted to an unreachable host. (0x80072751)
Checking the System Time revealed I was two years in the past (2007) for some unknown reason. After correcting the date I could connect to Windows Update fine. After a mammoth 70 updates and a reboot I’m presented with a strict ‘Activate Now’ prompt on logon. I presume that since my WHS install believes it has been installed for two years without activation it thinks it’s time to get serious. After I activate it I ran Windows Update again and this time it installs 5 more updates. Once the OS is stable I connect up the extra hard drives and add them to the storage pool via the WHS Console Server Storage tab.
Clients
In order to connect to your Client PCs the server and Clients need to be in the same Workgroup making this alignment the next task, along with checking for useful machine names/descriptions. Once all the clients are ready I installed the Client Connector software on each client (all Windows 7 clients) and configure their backup schedules. All clients connected and performed a successful backup first time.
Before copying across all my data onto the Windows Home Server Shared Folders I made sure that ‘Folder Duplication’ was turned off. This was purely to maximise the transfer speed (as WHS didn’t have to perform any duplication during the copy process) but I made sure I turned ‘Folder Duplication’ on for all folders after the data was in place.
Setting up a Printer Server
Next I wanted to set-up my server as a Print Server ensuring that I could print from any machine without having to turn on the Desktop hosting the printer first. The printer is a basic Lexmark Z615 but there are some unsupported Windows 2003 drivers on the Lexmark site. After trial and error with these though I abandoned them and reverted to the XP drivers which worked ok. I did have to reboot several times though to completely remove the failed printer installed with the Windows 2003 drivers.
An annoying feature of Windows is that it searches the local network for other printers and adds them to the server. I don’t want ‘Print to OneNote’ and ‘XPS Document Printer’ printers on my server but deleting them is pointless as they will reappear. To prevent Windows from performing this auto search you need to turn it off by deselecting the option in: My Computer > Tools > Folder Options > View > “Automatically Search for Network Folders & Printers’.
With my print server setup I attempted to add the printer to my Windows 7 client, but this was to prove difficult too. I couldn’t find an option to specify the correct drivers to use for the Printer and the Vista printers (needed for Windows 7) weren’t installed on my server. In the end I found this blog post where it explains how to use the Print Manager tool (new to Vista Sp1) to add additional drivers to your print server. This worked perfectly and on the next attempt it downloaded the Vista drivers correctly and installed the printer successfully.
WHS Add Ins
I intend to install and (time permitting) write plenty of Add Ins for use with WHS as I think that they are an excellent way to add functionality to your server. So far I have installed the Microsoft WHS Toolkit v1.1 and Andreas M’s Advanced Admin Console. I find the Advanced Admin console useful for accessing admin tools via the Console without having to Remote Desktop into the server each time. Over the next few weeks I hope to review the Power Management Add-Ins and install one to help my server to get a few hours sleep over night when it’s not required, thus saving power and money.
Summary
So that’s my build story. My home server is up and running and I’m so far very impressed with it. I aim to post some more articles about Windows Home Server over the coming months.