Capturing your Camcorder DV Video with Windows Live Movie Maker & Windows 7
I have five years of Mini-DV Camcorder tapes stacked up on my shelve. My plan has always been to transfer the video off onto my PC and then reuse the tapes, but for various reasons this never quite happened, instead the pile just grew bigger and bigger. Not for any longer though as I am refusing to buy anymore tapes and forcing myself to get the video transferred.
Firstly I need to connect the camera and as my camcorder is a Sony its the good old Firewire card and unfortunately Windows 7 (and Vista before it) refuses to recognise it. After some messing about and moving slots (why oh why did Microsoft remove the ability to manually adjust IRQ settings?) I give up and order a new card (a Belkin 3 port FireWire PCI card) which happily Windows 7 finds and embraces straight away. My Sony then appears in Windows in the list of devices in “My Computer”.
Now I have the connectivity I need the software to import the data in. There are numerous options but I already have two installed; Nero and Windows Live Movie Maker. Windows Live Movie Maker replaces Windows Movie Maker but is not included in the Windows 7 installation but instead is part of the free Windows Live Essentials pack for download separately. Nero Vision does a good job but Windows Live Movie Maker provides the option to automatically split the video into multiple files. It seems more natural to me to have a collection of video files instead of a monolithic 60 minute video. Separate files also makes it easy to quickly remove scenes and include extra ones later when adding the video to a DVD.
Importing via Windows Live Movie Maker
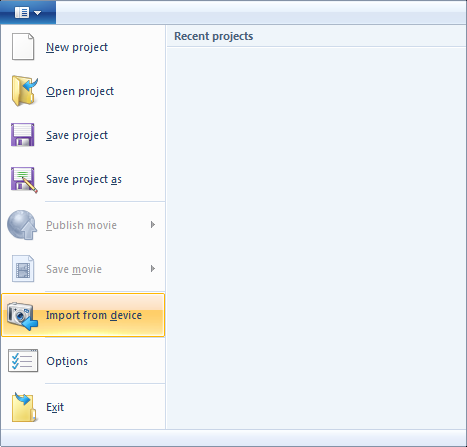
1 Open Movie Maker and select “Import from device” from the top menu.
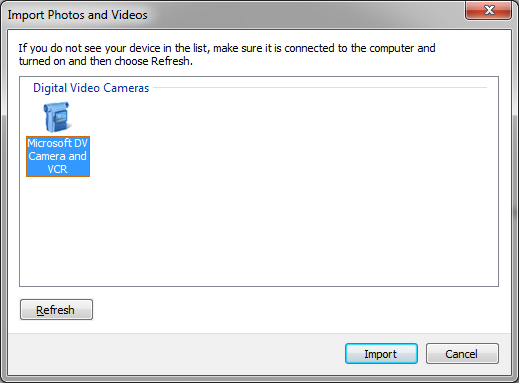
2 Select device:
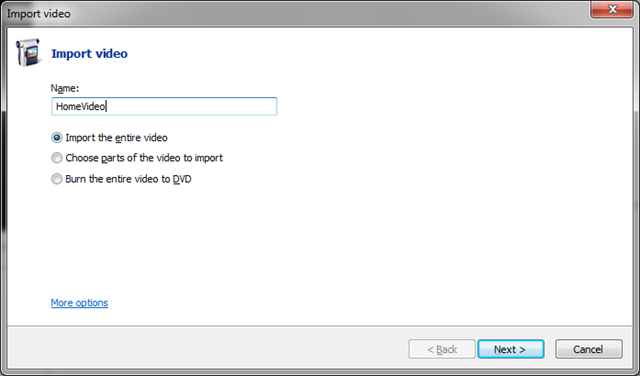
3 Name the video and pick options:
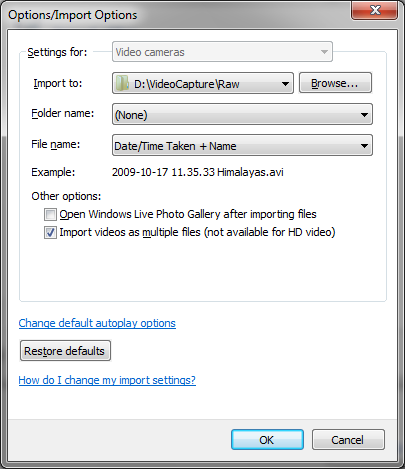
To create multiple files instead of one monolithic file check the bottom checkbox.
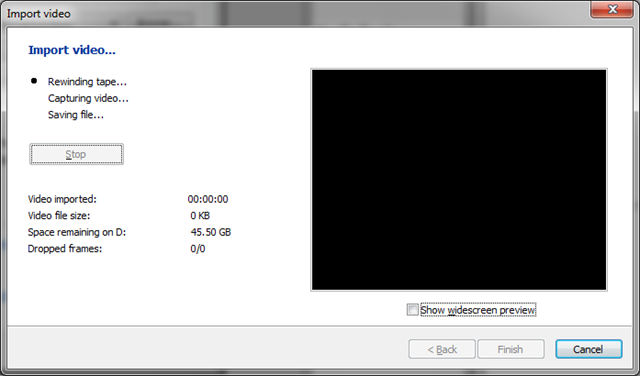
4 Ok the options dialog and click Next, then sit back and wait for the video to stream. It will take as long as the length of video you’re streaming takes to play. If you selected to import the whole tape the video will play for the length of the tape and then will spend around 5 to 10 minutes to splitting up the file.
WARNING: It takes a lot of disk space to import video, with a 60 minute tape creating about 12GB of video files. Make sure that you have plenty of free space before you start to import the video. Also if you have chosen to split the video into multiple files you will need to have double the free space. This is because a single file is created initially (e.g. 12GB) and then the multiple individual files are created before the original is deleted which means that there will be twice the amount of data during this process (e.g. 24GB). If there is not enough disk space to create the individual files then Movie Maker will just inform you that it is unable to split the video into multiple files and you get left with the single file. You would then need to free some more space and then re-import the video again to end up with the desired collection of multiple videos which is a waste of a valuable hour of your life.
What format should I save the Video in?
Now that the video is imported I want to keep it in a digital format but should I store it? Well I wanted to create DVDs from the tapes and so I am using Nero for this purpose as I like the way it creates the DVD menu’s etc. DVD maker included with Windows 7 could alternatively be used for this purpose however. Creating the DVD is not so much for storage but for portability. I like the fact that I can watch my videos on any DVD player but it’s not the ideal way to store the video for the future. Video is compressed down to get it onto a DVD and although the quality is still very good it doesn’t maintain the complete raw format that ‘might’ be useful in the future when converting to new and improved video formats. When looking around for a format to store this 12GB/hour video it occurred to me that although this was a large amount of data it is in fact getting smaller by the day anyway as technology improves. When digital cameras first came out people were looking for ways to compress their images as several MB per photo seemed hard to store. Of course we now take it for granted that a photo is 5MB and hard drives are now sold in the Terabytes meaning it is less of a problem. So I’ve decided to keep my video in it’s raw AVI format for the foreseeable future, and have stored it on my already bulging Windows Home Server.
