Using PowerShell for your VS Code Integrated Terminal
Microsoft’s superb Visual Studio Code editor has an integrated terminal which is accessed via the ‘View’menu or via the Ctrl+’ shortcut keys. On Windows by default the terminal used is the Windows Command Prompt (cmd.exe) terminal, however you can easily configure VS Code to use a different terminal such as Windows PowerShell.
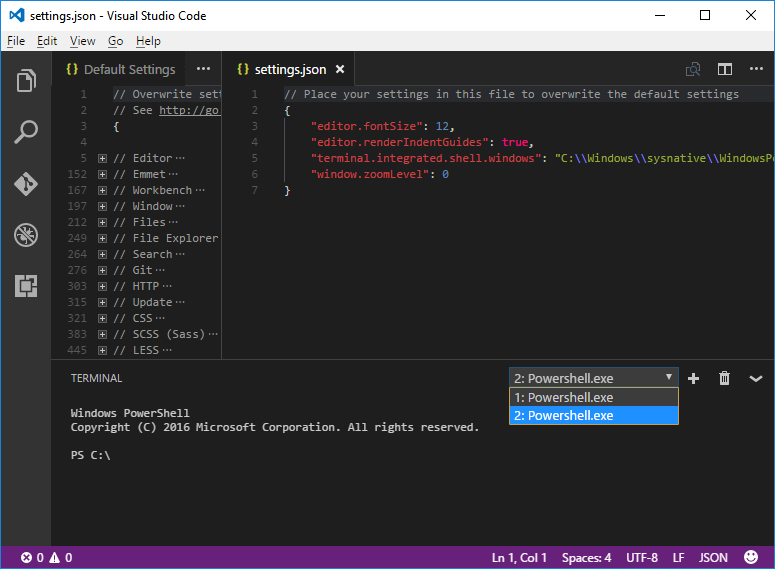
Open the User Settings config file (the ‘settings.json’ file accessed via File > Preferences > User Settings) and modify the setting for which terminal to run on Windows:
The default setting is:
1
"terminal.integrated.shell.windows": "C:\WINDOWS\system32\cmd.exe",
To use the PowerShell terminal instead add this to your settings.json user settings file:
1
"terminal.integrated.shell.windows": "C:\Windows\sysnative\WindowsPowerShell\v1.0\Powershell.exe",
Now PowerShell will be used instead of cmd.exe. Currently only one terminal can be configured in VS Code and so you can’t have both PowerShell and cmd.exe so you’ll have to choose your favourite for now. You can however access mutliple instances of the terminal via the drop down on the terminal window.
Finally whilst on the subject of VS Code and PowerShell I recommend installing Microsoft’s PowerShell Extension which lets you code and debug PowerShell scripts directly within VS Code (and benefit from its features, e.g. git integration etc).